Anytime you see the View Contacts icon throughout the application you can click it and pop-up window will display those email contacts
Go to Contacts > View Contacts on the main navigation menu.
The Info icon at the top if the View Contacts screen shows information about what contact data you are viewing.
By default, you will see a list of all Active status Email Contacts.
Filtering Contacts
When you open the View Contacts window, you will find optional filters at the top of the window.
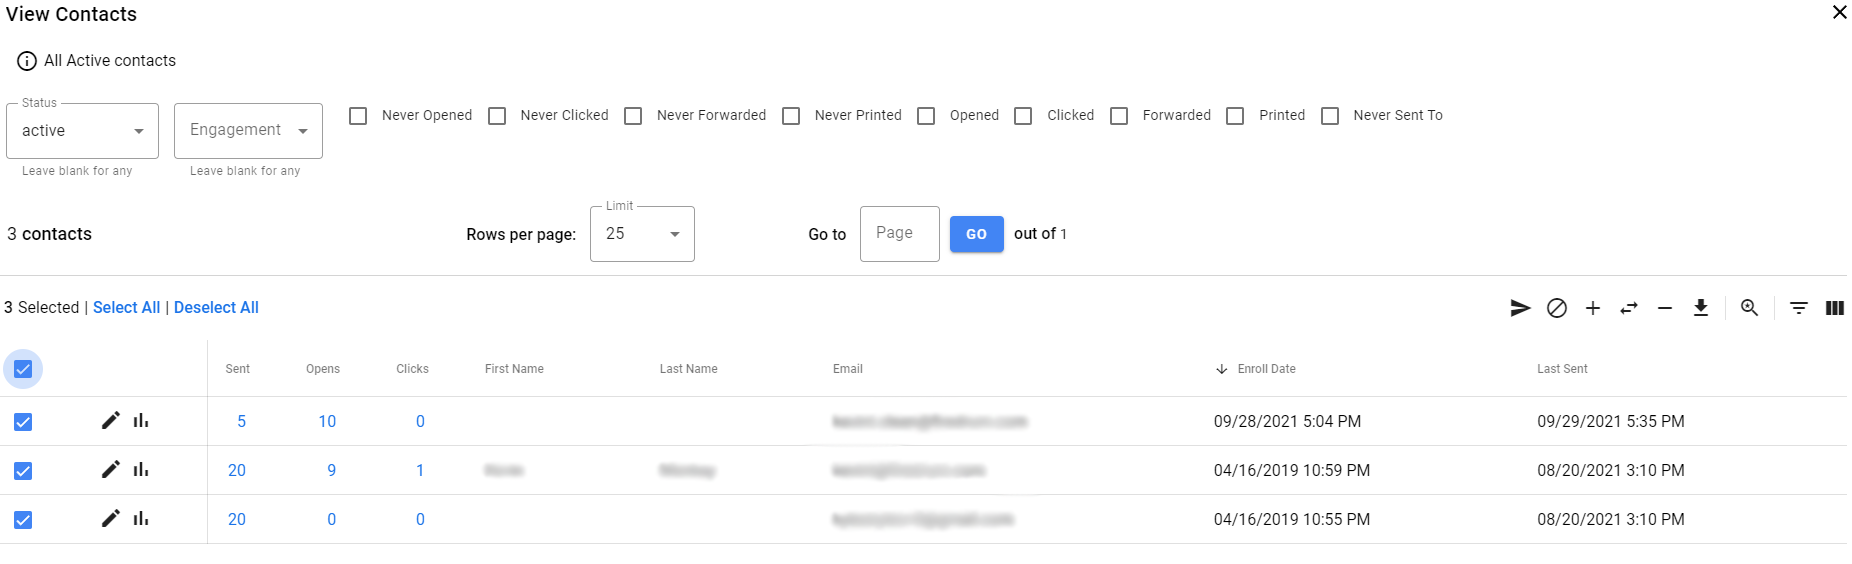
Use a combination of the drop-down menus, and checkboxes to filters of your Contacts

1. Click the drop-down arrow on Status to choose either Active, Not Active or All.
2. Click the second drop-down arrow Engagement to choose either Engaged, Unengaged or All.
3. Use the filters (Never Opened, Never Clicked, Never Forwarded, Never Printed, Opened, Clicked, Forwarded, Printed, and Never Sent To) to further refine the view of your contacts.
Contacts in this list
Total email contacts in the current contact list.
The contacts in this list indicates the total email contacts in this contact list, not the number on the current page.
Rows Per Page
Use the Per Page drop-down to set the number of Contacts you want to view on each page of the View Contacts screen.
Choosing a large number of Contacts to show per page can slow down the load time on the View Contacts page.
You can also skip directly to a page using the “go to page” field, or selecting a page number on the right side.
Go to Page
Use the Go to page field to move quickly between pages.
1. Type in the page number you want to move to.
2. Click the Go button.
Page Numbers
Select the Page numbers shown on the far right of them to move to different pages.
1. Select any page number to move quickly to the selected page.
2. Select the previous page and next page icons to navigate pages.
3. Select the previous page set and next page set icons to navigate page sets.
Selecting Contacts
Selected
Indicates the number of email contacts currently selected on all pages.
Select All
Click Select All to select all email contacts on all pages.
Deselect All
Click Deselect All to deselect all email contacts on all pages.
Page Select All
Above the first column of the contacts list is a checkbox to toggle selecting all contacts shown on the current page.
Individual contacts can also be selected with the checkbox on each line of the contact list.
Create a Saved Search 
Saved searches are lists of contacts that fall under a search criteria, or fit the criteria for being on the list you are currently viewing. Saved searches are dynamic in that they will grow or shrink in size based on the contacts that fit that search criteria. Saved searches will appear as lists when you are scheduling an email campaign.
1. Select checkbox(s) next to the email contact(s).
2. Click the Save a Saved Search action to open the dialog window.
a. List Name: Type in a name for your saved search list.
b. List Description: Type in a short description of the list to help you use it in the future, it’s a good idea to include a description on the filters used when making the list.
c. Click the Save button. You will see a confirmation message “Saved” when you are returned to the View Contacts screen.
Example of using a saved search
- You can run a search for currently active contacts that are in a certain state. This saved search will always stay up to date with those filters, so as more contacts in that state subscribe, they will automatically be included in this search.
- If you view a campaign report and select a data point like “clicks” you can view the members and create a saved search. If more people click on that email in the future, they will automatically be added to the saved search list.
Saved searches can sometimes be complex. Please talk to support if you need help.
Show/Hide Filters 
Show or Hide all filters on the top of the page.
Modify Columns 
Select which fields from your database you want to view on the View Contacts screen.
1. Select the Modify Columns to view a list of available columns.
2. Select the fields you want to show in View Contacts by clicking on the box to the right of the field name.
3. Click the Save button.
Bulk Actions
If one or more contacts are selected, a row of icons appears just below the page number on the right side. Each bulk action is described below.
Send Email Campaign 
In some instances you may want to send an email to a contact or small number of contacts without starting a new email campaign. For example, a contact has requested that you resend the latest email campaign to them. The Send Email Campaign action is not intended to send to large numbers of contacts and is restricted to 1000 email contacts.
1. Select checkbox(s) next to the email contact(s).
2. Click the Send Email Campaign icon to open the Send Email Campaign dialog window.
3. Check the box for the email campaigns you want to have sent.
![]() Use the view icon to see the campaign(s) that will be sent.
Use the view icon to see the campaign(s) that will be sent.
4. Click Send Email Campaigns at bottom of Send Email Campaign dialog window.
Deactivate 
For more information on what deactivation means read about Deactivating Contacts.
1. Select checkbox(s) next to the email contact(s).
2. Click the Deactivate action.
3. Confirm the deactivation.
Add to List 
The contact remains in existing list and can be added to other lists.
Move to List 
Contact is moved to another list(s) and is removed from the current list.
Remove from List 
Removes contacts from all selected lists
Download 
1. Select checkbox(s) next to the email contact(s).
2. Click the Download action to open the dialog window.
a. Include which Lists each Email Contact is in – select this option to include a column in the download file for which list each contact is in.
List of Contacts
Deactivated Contacts hav a red X icon next to the contact.
Checkbox – Used to select individual email contacts. contacts can be selected across multiple pages.
Edit Contact – see Editing Contacts
View Activity Report – Contact Activity Report
Opens, Clicks, and Bounces columns
This provides all-time total overall email campaigns for each contact.
Opens and clicks are highlighted here so you can quickly see who’s most engaged.
Sorting Columns
You can sort the Contact list by any of the column names in either ascending or descending order.
1. Click the column heading to sort the column.
2. By default, sorting will be in ascending order (A to Z). The ascending icon will be displayed to the left of the column heading.
3. Click on the same column heading a second time to change the sort order to descending (Z to A). The descending icon will be displayed to the left of the column name.